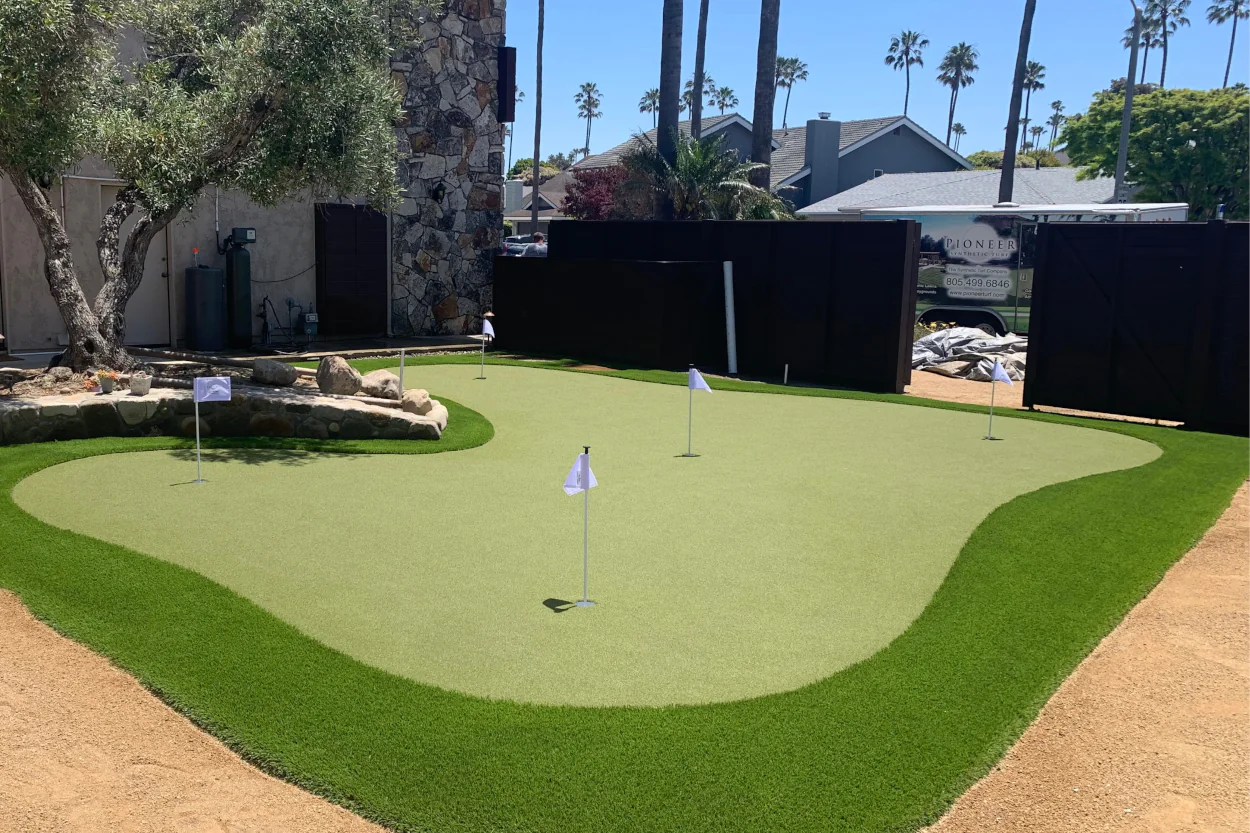
Turning an Established Lawn Space into a Putting Green
You've got an area of yard that doesn't get much love. Maybe it's the side yard, a corner of the yard, or that oddly shaped patch of grass that never seems to look right, no matter how much try to maintain it.
Here's a thought to keep in mind. The overlooked area could become a backyard putting green. A high-quality one, if you tackle it the right way.
Fortunately that lawn to putting green conversions are more achievable than people realize. The not-so-secret secret? The results that truly look and perform like a real green — the kind you brag about to your golf buddies — usually come from partnering with a professional installer who knows exactly what they're doing from day one.
Here's a quick look at what is involved in a professional-grade putting green conversion, and why every step is best left in the care of a professional installer.
Step 1: Prep Work - Where Most DIY Projects Fall Apart
A professional installer’s initial responsibility is one most property owners don't anticipate: assessing the site. Terrain slope, drainage flow, soil composition, irrigation challenges — all of it is evaluated before a single shovel breaks ground. Poor preparation is the primary reason backyard putting greens experience sunken spots, water puddles, or turf that bubbles or shifts after the first heavy rain.
Experienced pros take out existing grass and plant growth down to the correct depth, handle any drainage issues proactively, and grade the surface with precision. Doing this step correctly is what separates a green that performs well for years from one that's a maintenance issue by the next season.
Step 2: The Base Build - The Foundation of a Great Green
The base is where a putting green is really decided. A proper crushed aggregate base layer — typically built in compacted layers — delivers the necessary drainage and structural firmness that synthetic turf needs to perform as intended. Install the base incorrectly, and even the best quality turf on top will solve the problem.
Experienced installers know the proper installation depth and compaction needs, how to create surface transitions and edges and borders cleanly, and how to create slight contours that help make the putting green surface feel realistic. This isn't an installation that should rely on estimation — it demands the proper equipment, the proper materials, and the right professionals.
Step 3: Turf Selection - Not All Putting Green Turf Is Created Equal
This is when material quality really counts. Putting green turf is a specialized product — different turf pile heights, different turf fibers, and different infill systems all impact how the golf ball rolls, how the surface performs to foot traffic, and how the green appears over time.
A professional installation expert will consider the local climate in Sarasota, how much direct sun the space experiences, your desired ball speed, and how much play the putting surface will actually get. This level of product knowledge leads to a real difference in the end product.
Step 4: Finishing Touches - The Details That Make It Feel Real
A great putting green isn’t only about the turf surface. Cup placements, fringe sections, chipping zones, and perimeter borders all contribute to how the completed green comes together visually and functions. Experienced professionals think through the whole picture — how the putting green fits with your current landscaping, where the visual lines are, and how to make the space feel intentional rather than dropped in. Applying infill is another key finishing step that's commonly overlooked.
The correct type and amount of infill material impacts ball roll, surface recovery, and how the putting surface holds up over years of use. When applied incorrectly, it can negatively affect the entire installation.